This article explains how to edit the syllabus template in the course map application.
STEP 1
Click here to log in to the Course Map Application
- Search for your course
- Click on Version
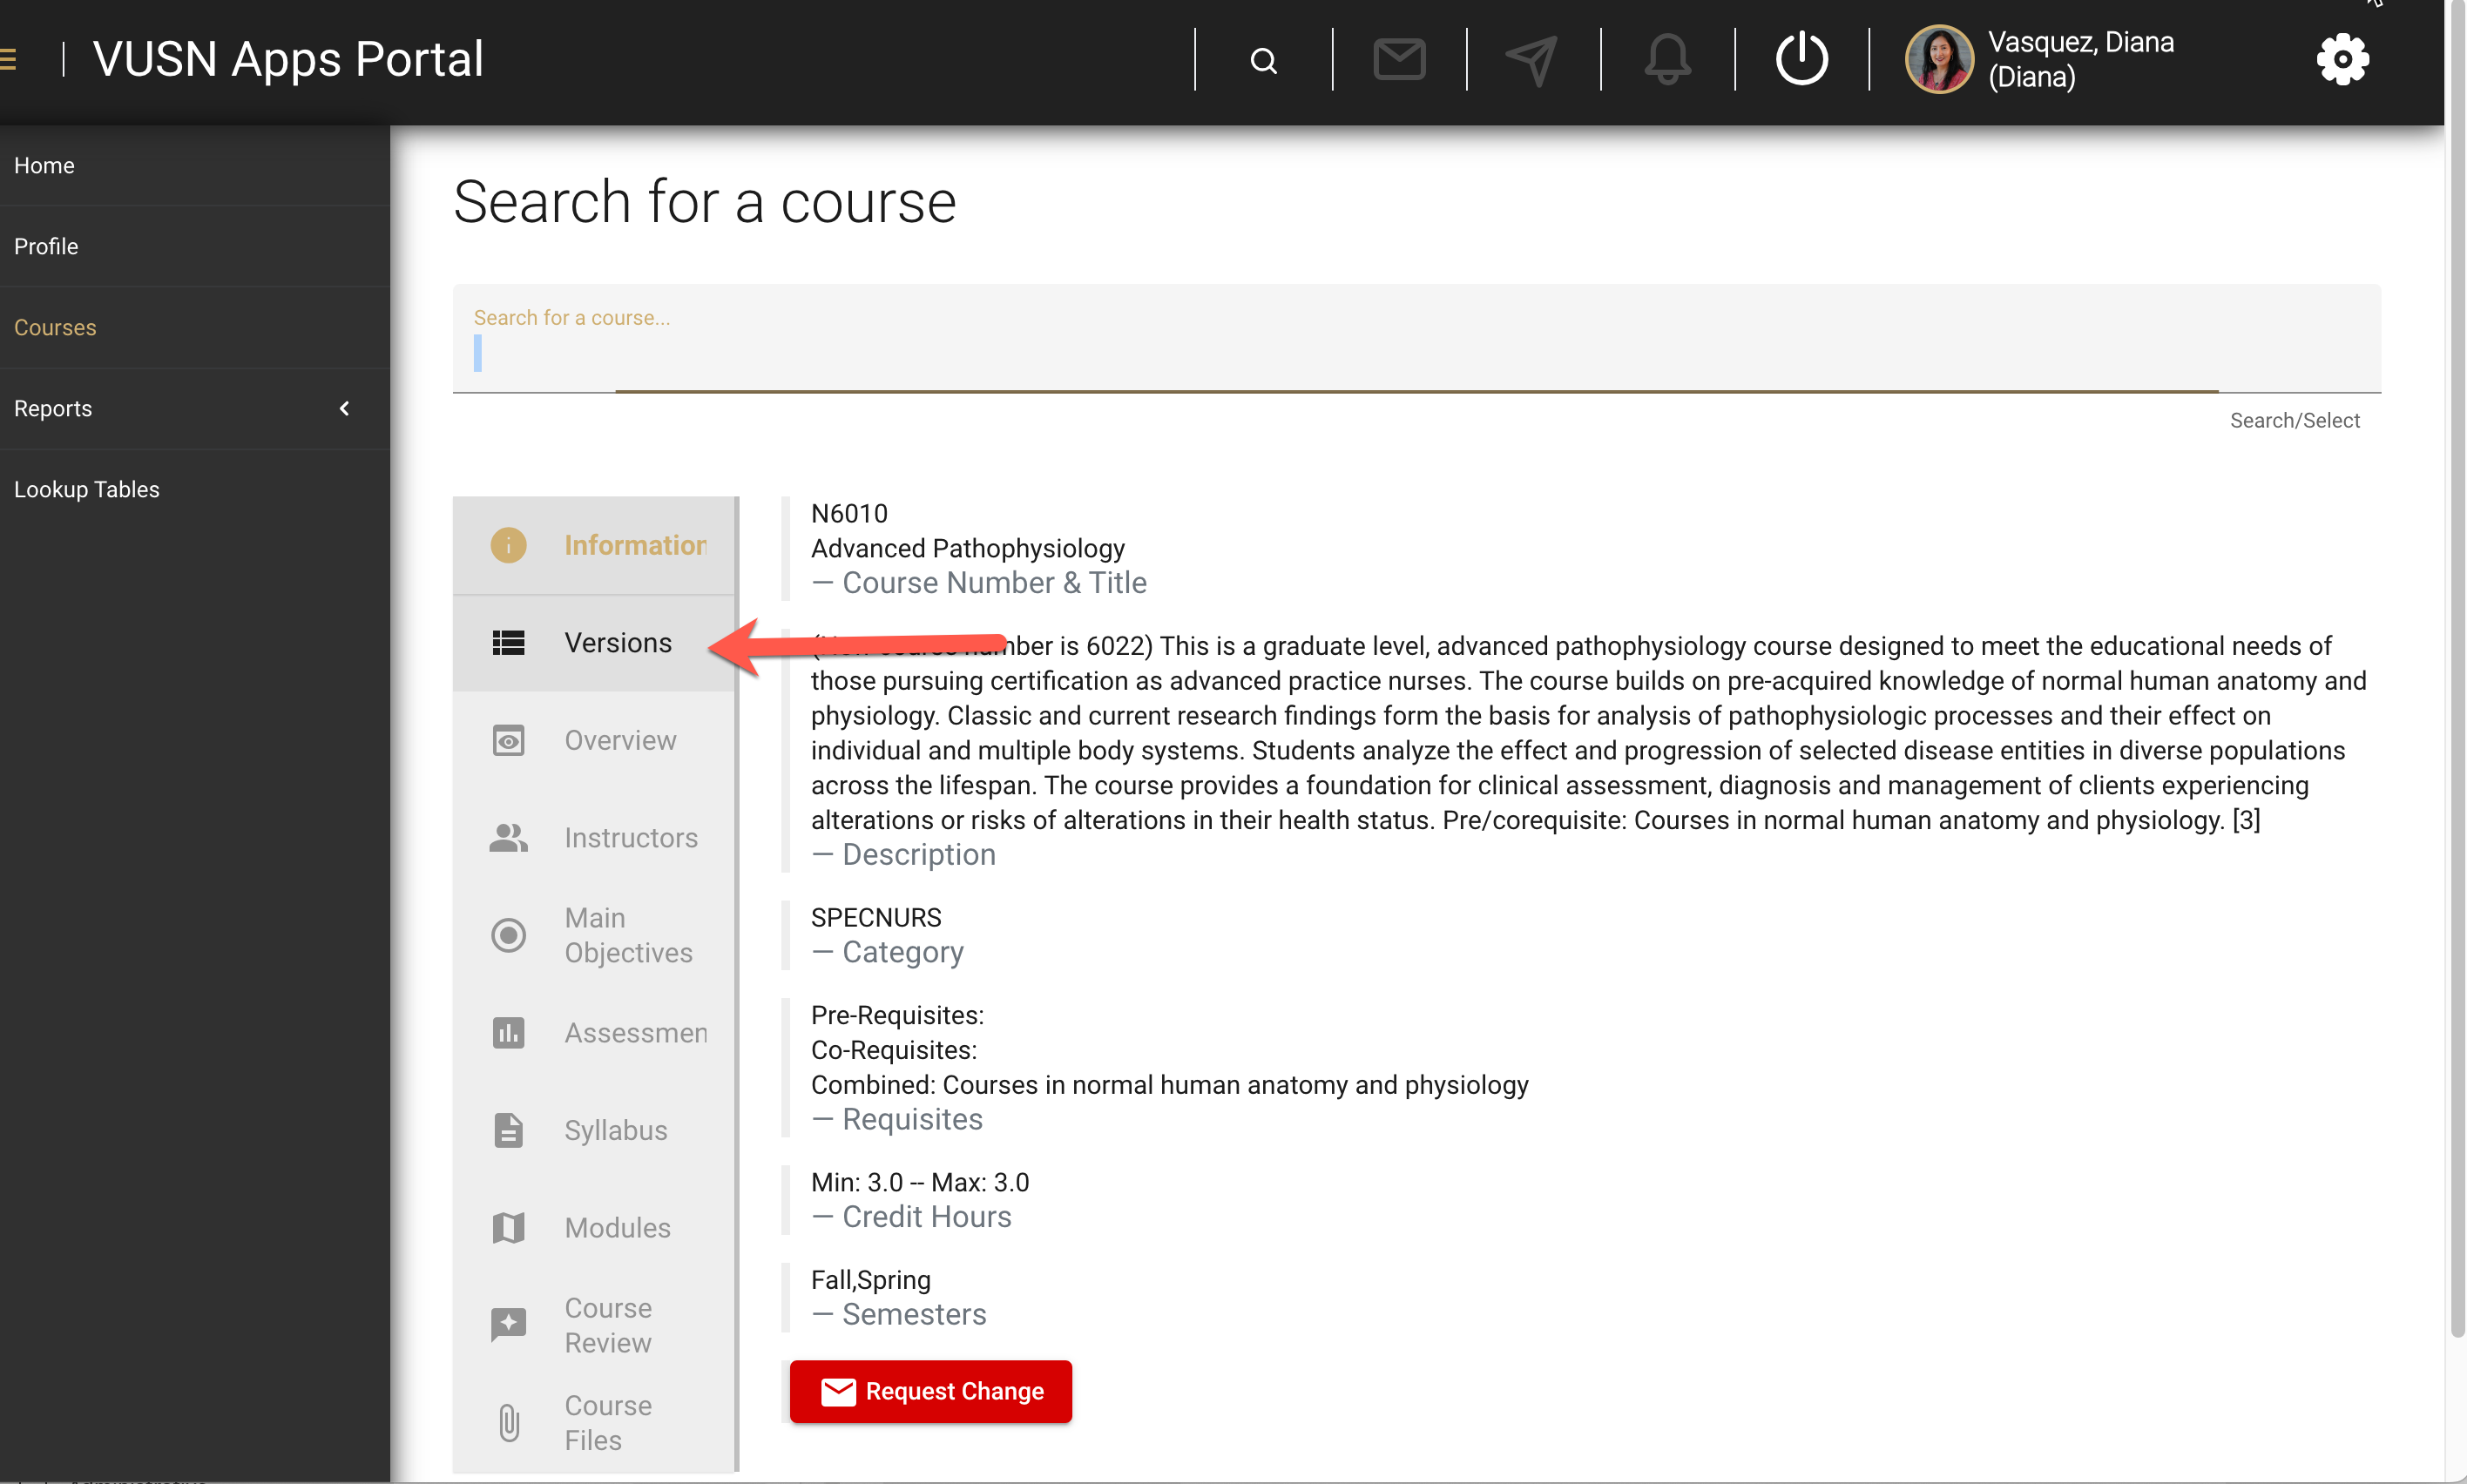
STEP 2
- Edit the current version- Only available if the review status is
Verifed. If the option is not available contact the D3 team at vusnd3@vanderbilt.edu - Add a new version (if you want to start with a blank template)
- If there are no existing versions, click
+Add Course Version

OR

OR

STEP 3
Enter or edit course version information in the Overview section
- Indicates the semester for the version you are creating
- Select the appropriate Academic Program
- MSN programs should select the Course Level
- If the course is an MSN Specialty course, you will have the option to select one or more Specialties
- Check the box if the course is for all specialties or one of the Professional Formation courses
- Select the Delivery Method
- Enter the approximate number of students enrolled in the course
- Check the box indicating if the course is Didactic or Clinical. These boxes trigger specific statements on the syllabus.
- Save the overview information

STEP 4
Use the left navigation to visit each section
- Instructors/Coordinators: Add or Edit instructors to the course
- Main Objectives: View your objectives and connected essentials, competencies, and program outcomes
- Assessments: Add or Edit course assessments
- Syllabus: View, fill, and edit the course syllabus
- Modules: View your course alignment table
- Course Review (Audit) : Course Alignment Audit by the instructional design department
- Course Files: Add any course files (not required)
STEP 5
- Check the pre/co-requisites and course description for correctness. If changes are needed, please contact the appropriate curriculum committee.
- Add a separate statement regarding how course builds on pre-requisite knowledge (copy and paste from another file or type directly in the form).
- Click here for more information on how to use the HTML editor.

STEP 6
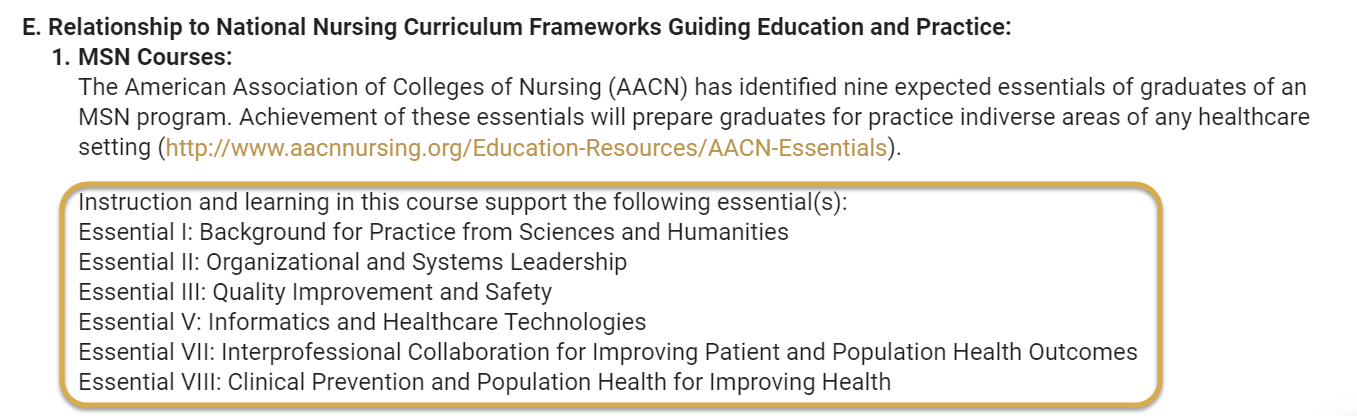
Check the AACN Essentials. If the essentials are not listed, or are listed incorrectly, please download and complete the appropriate Objectives Alignment form below, and send to the Instructional Design team.
Nurse Midwifery Objectives Form
STEP 7
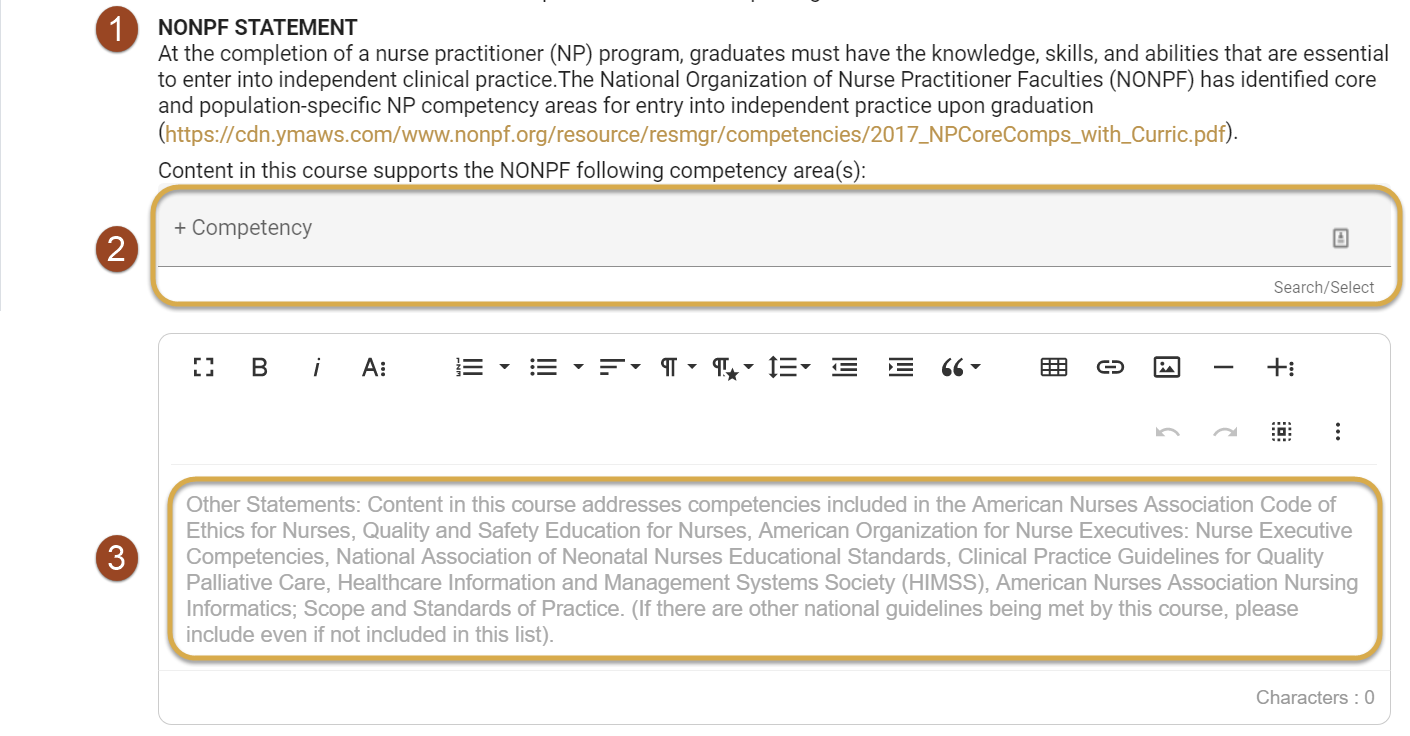
- MSN courses should see the NONPF Statement, and Nurse Midwifery courses should see the the ACNM Statement. If the ACNM statement is missing but required, please edit the course Overview to include Nurse Midwifery as the specialty.
- If applicable, select the NONPF Competencies addressed in the course. If the competencies listed are incorrect, please add or delete using the drop-down menu.
- Check that any other statements needed for the course are listed and correct. Any changes can be edited directly in the HTML box.
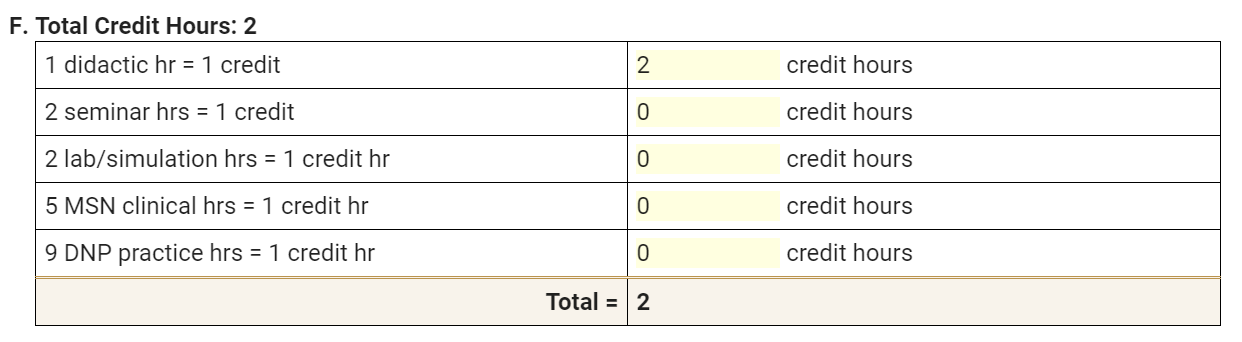
STEP 8
Enter or edit the credit hour breakdown. Please note that the total credits must equal the number of credits listed in the catalog if clinical hours are selected. The clinical hour formula will show.
STEP 9
- Enter any information you want students to know regarding the course delivery, class dates/times, room numbers, etc.
- Enter dates for First and Last Day of class, and/or Final Exam/Course Work. You may type the dates or use the calendar feature.
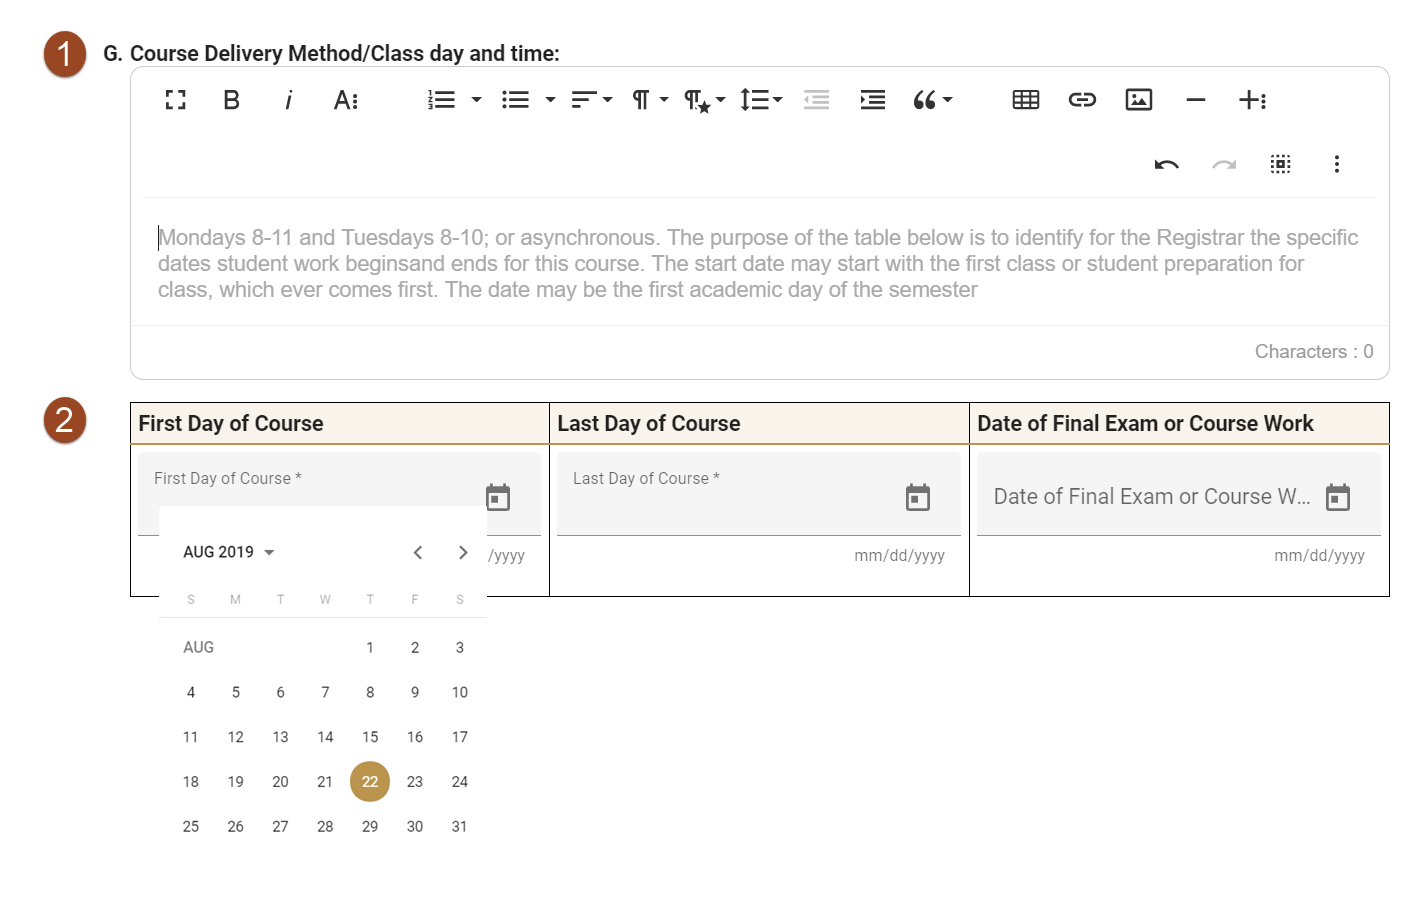
TIP: In order to save or print the syllabus, dates for the First and Last day of class dates must be entered.
STEP 10
Check that the course faculty listed are correct.
-
- If a faculty role, address, phone number, or email is not displayed, or is incorrect, click the icon OR click the icon to delete the faculty completely.
- To add additional faculty click
+Add Instructor/Coordinator

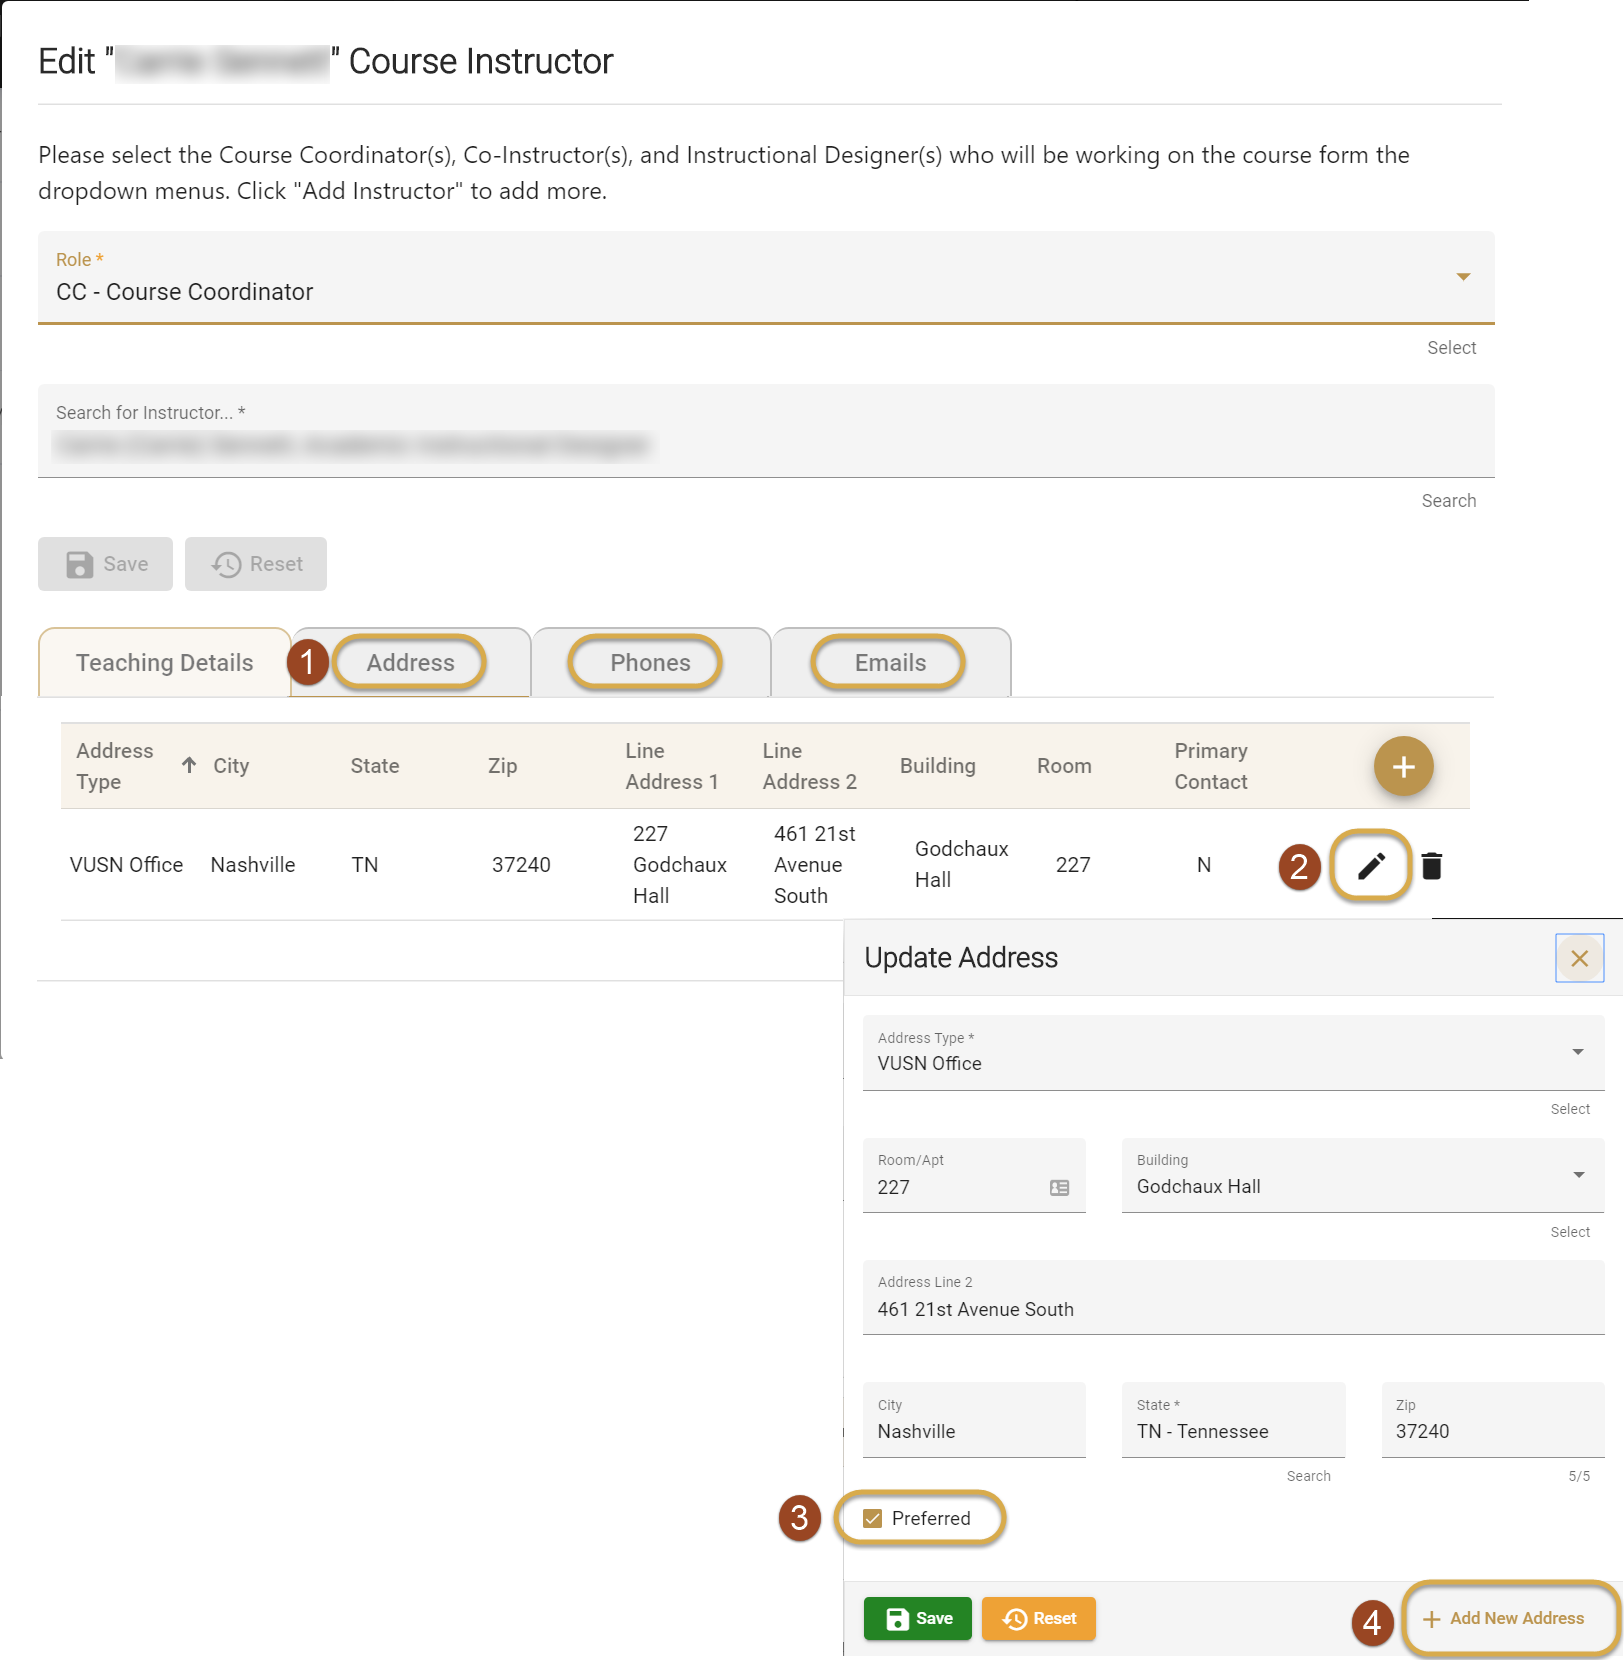
If the faculty office, phone number, or email address does not display, start with step 1 above then:
- Click one of the tabs to select
- Click the icon next to the information you want to edit
- In the pop-up window, check the Preferred box to select the information you want to display in the syllabus
- Click
+Add New Address/Phone/Emailif you want to add additional options
TIP: If the course faculty is not listed. Contact the Instructional Design team at: vusnd3@vanderbilt.edu
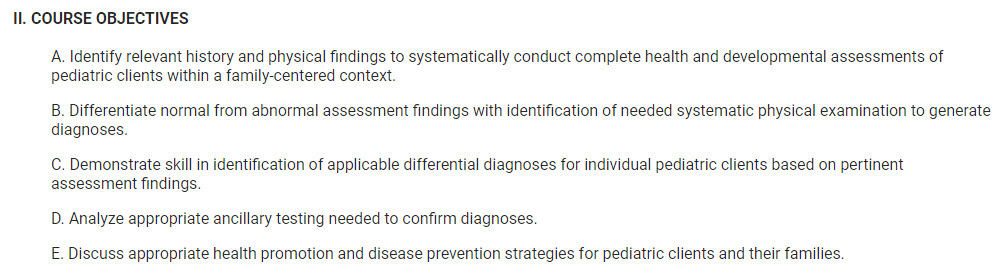
STEP 11
Check that the course objectives listed are correct. If changes are needed, please contact the appropriate curriculum committee.
STEP 12
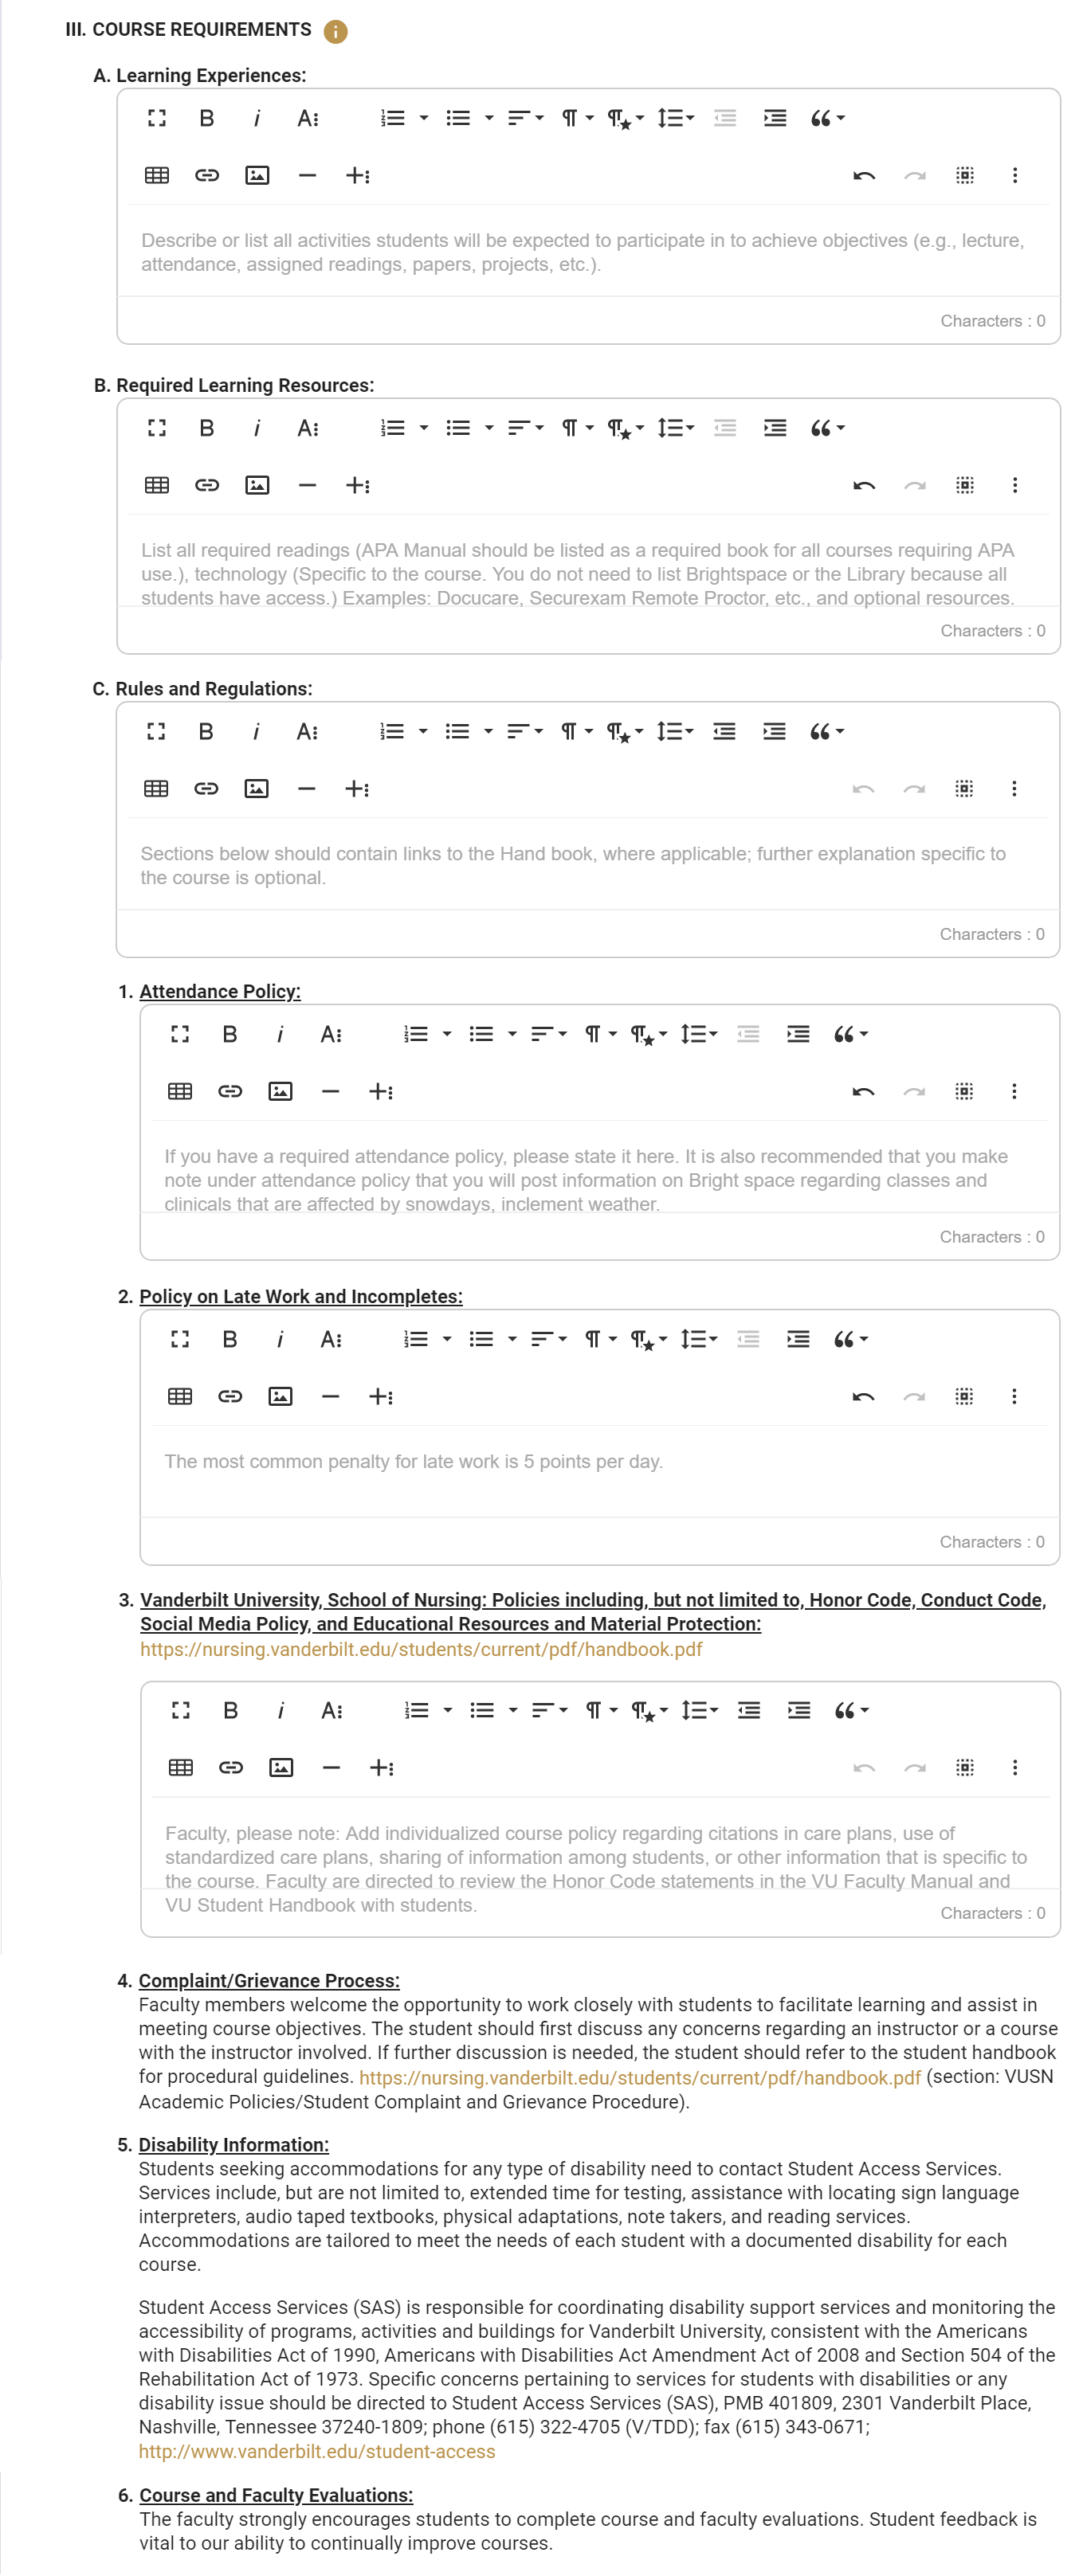
Add or edit content for Learning Experiences, Required Learning Resources, Rules and Regulations, Attendance Policy, Policy on Late work and Incompletes, and any other Honor Code, Conduct Code, or Social Media Policy statements applicable to this course.
NOTE: The information stated in numbers 4, 5, and 6 of the Rules and Regulations section cannot be edited.
STEP 13
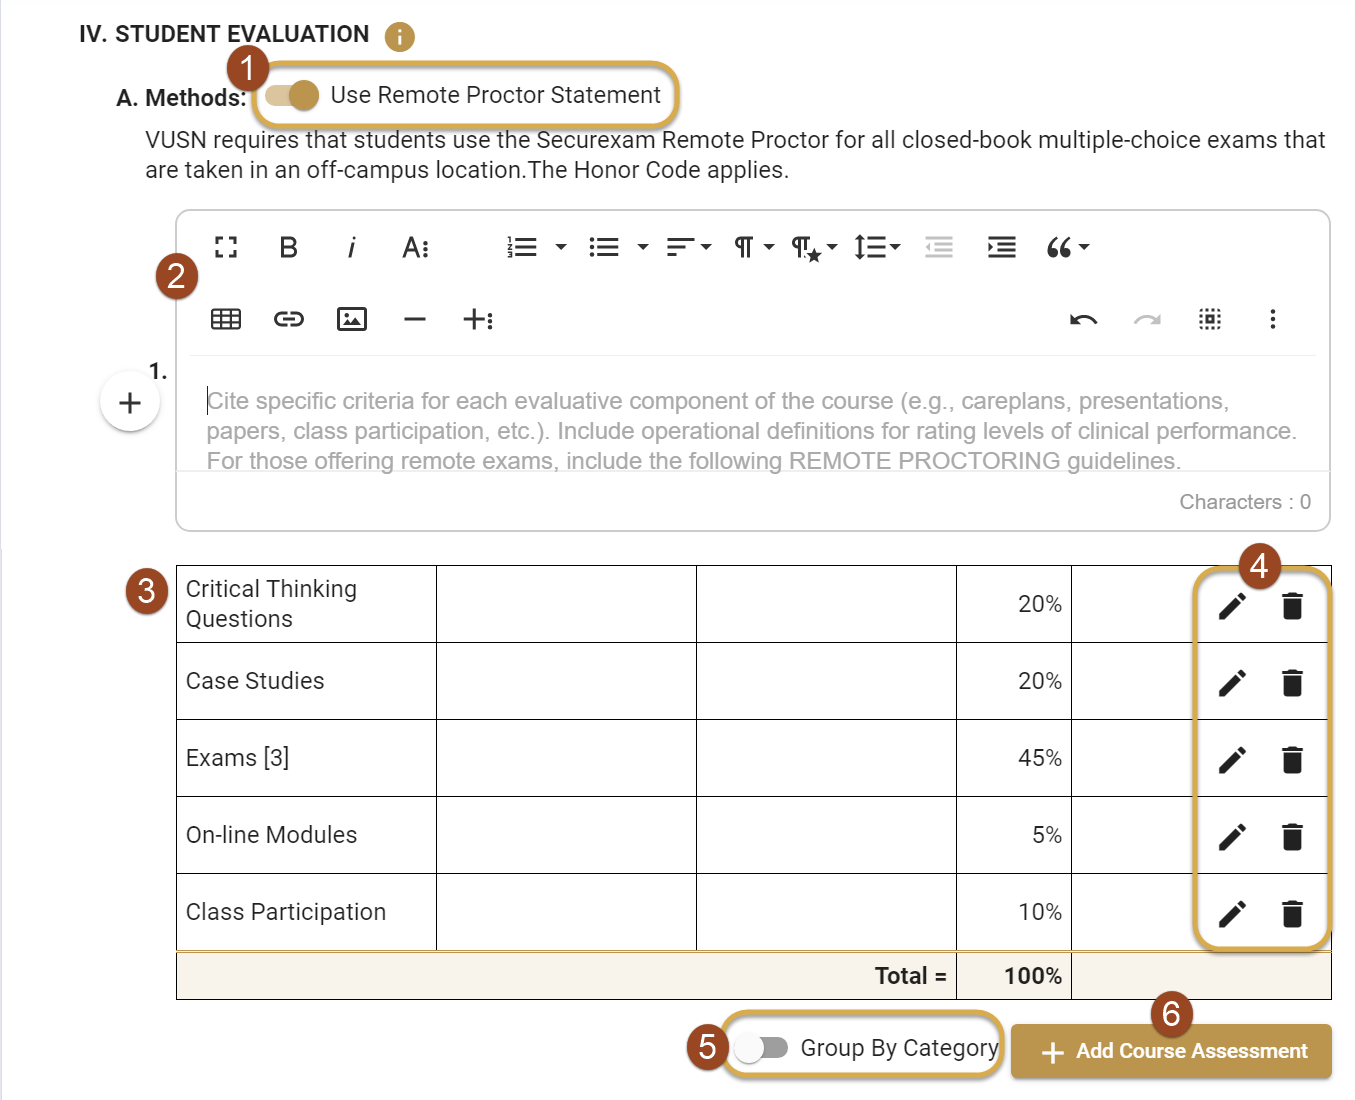
- If your class does not use Remote Proctor, toggle the Remote Proctor Statement off
- Add or edit information for Methods of Student Evaluation
- Check that assignments listed in table are correct.
- To edit an assignment click the icon OR click the icon to delete
- Use the “Group By Category” toggle to add category headings for assessments
- To add an additional assessment click
+Add Course Assessment
STEP 14
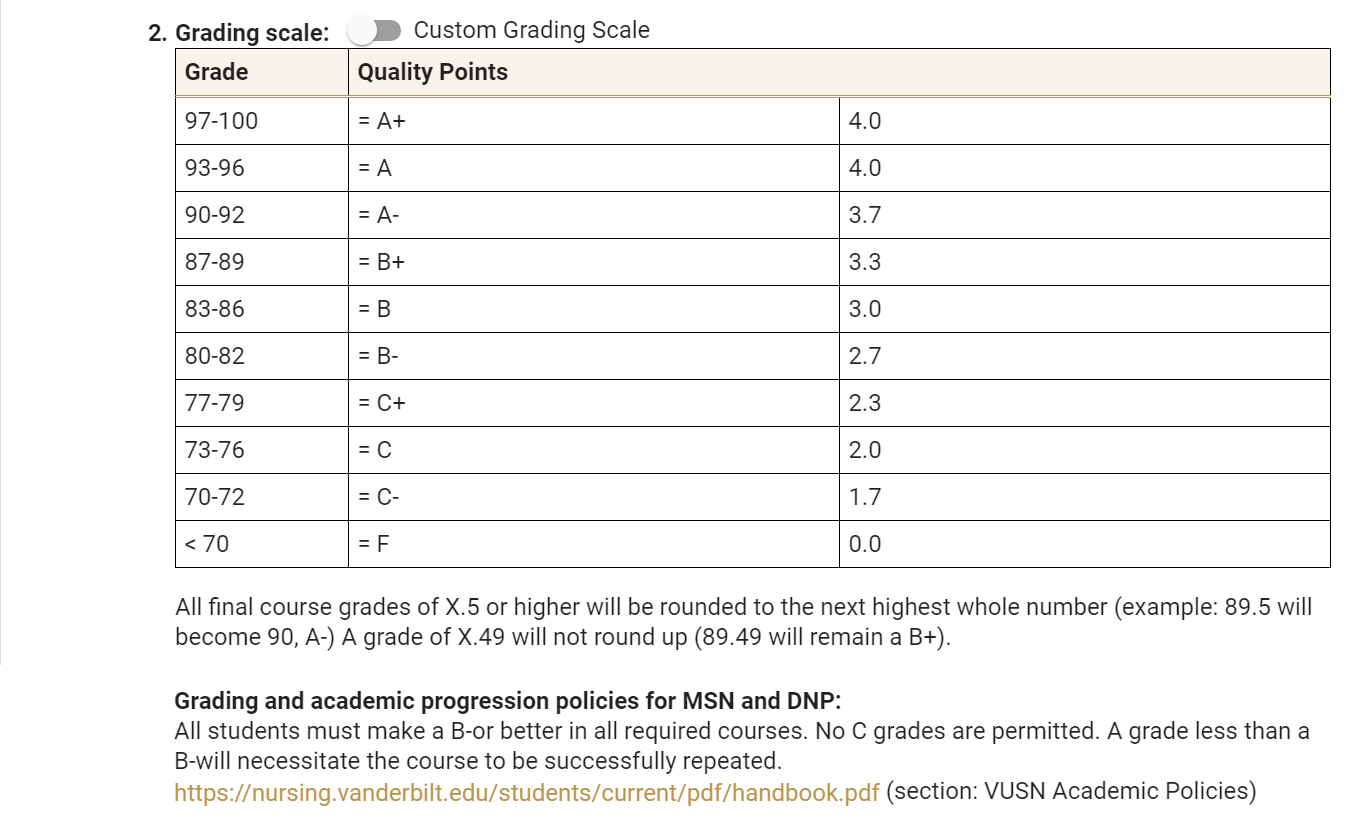
Most courses will use the standard VUSN grading scale; however, if your course uses a custom grading scale, click on the toggle to cut and paste the appropriate grading scale.
OR
STEP 15
When your syllabus is complete:
- Click
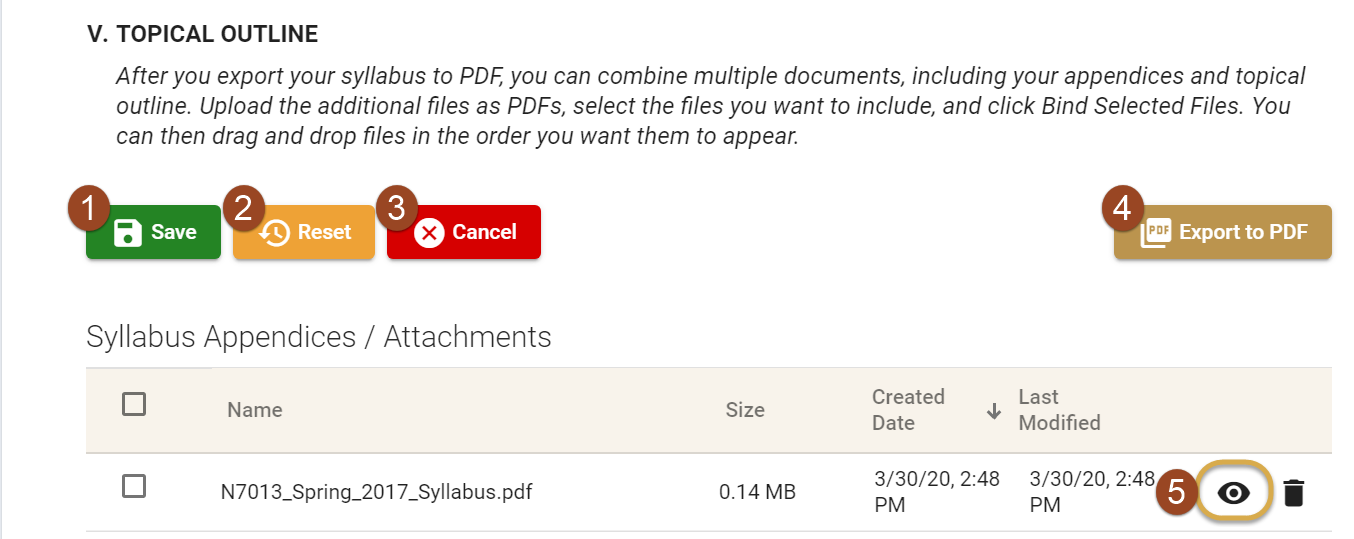
Saveto save all changes - Click
Resetto discard any changes - Click
Cancelto return to the main Course Map page - Click
Export to PDFto create a PDF version of the syllabus. After clicking this button, the file will be listed under Syllabus Appendices and will be automatically be added to your Course Portfolio - If you are finished and do not need to bind any additional documents, click the icon to open and download a copy of the syllabus to your computer. Post this downloaded copy to your Brightspace course, otherwise continue on to step 17.
STEP 16
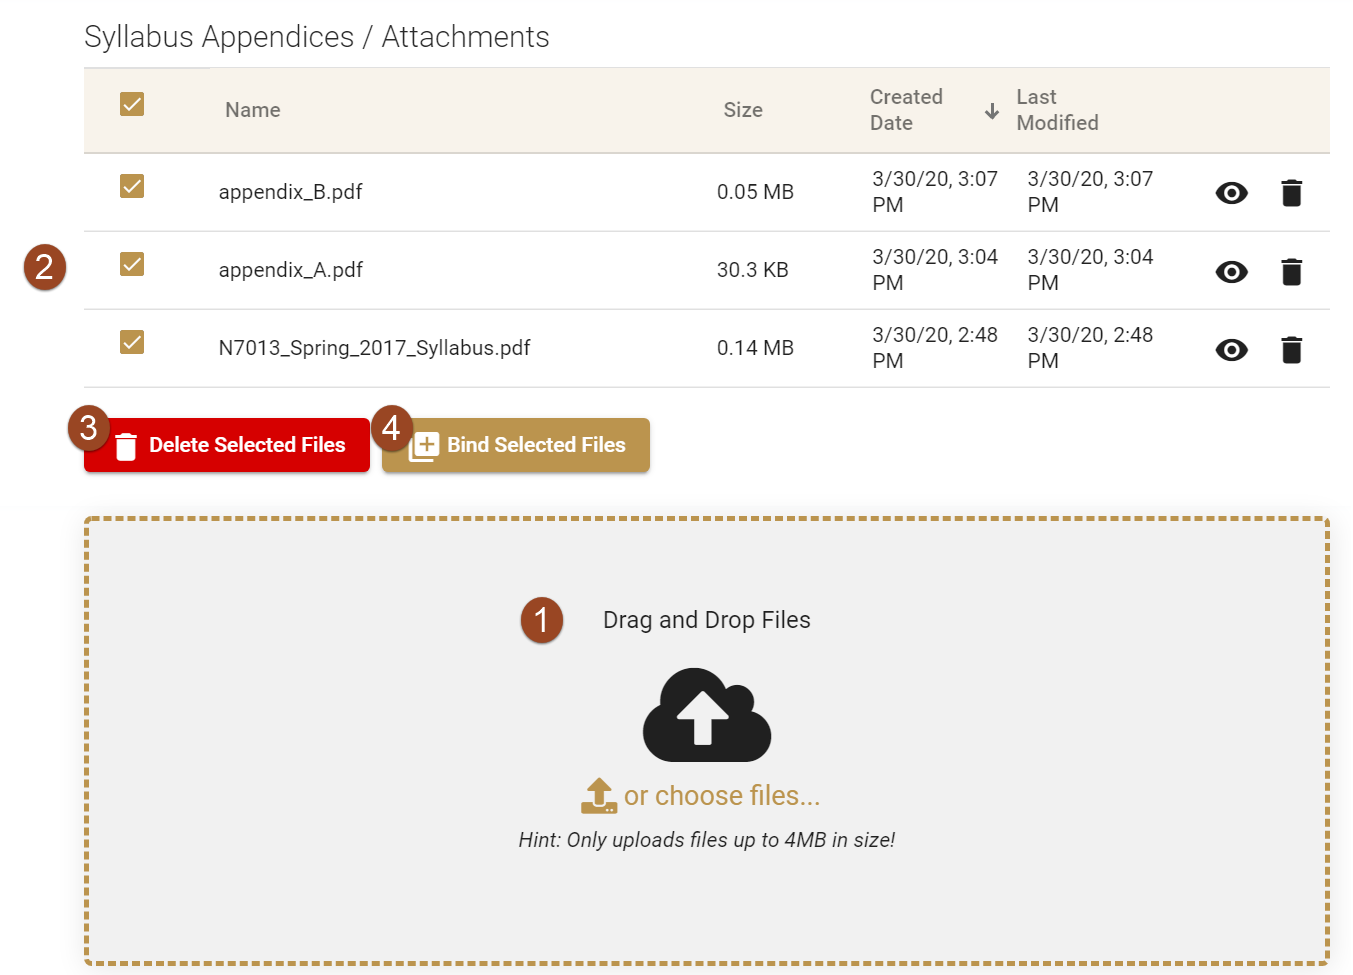
To add, delete, or bind additional documents, including appendices and topical outline:
NOTE: Additional documents must be uploaded as PDFs.
- Upload documents by dragging and dropping or click
or choose files - Select documents to include
- Click
Delete Selected Filesto delete a file(s) - Click
Bind Selected Filesto combine multiple documents with the syllabus
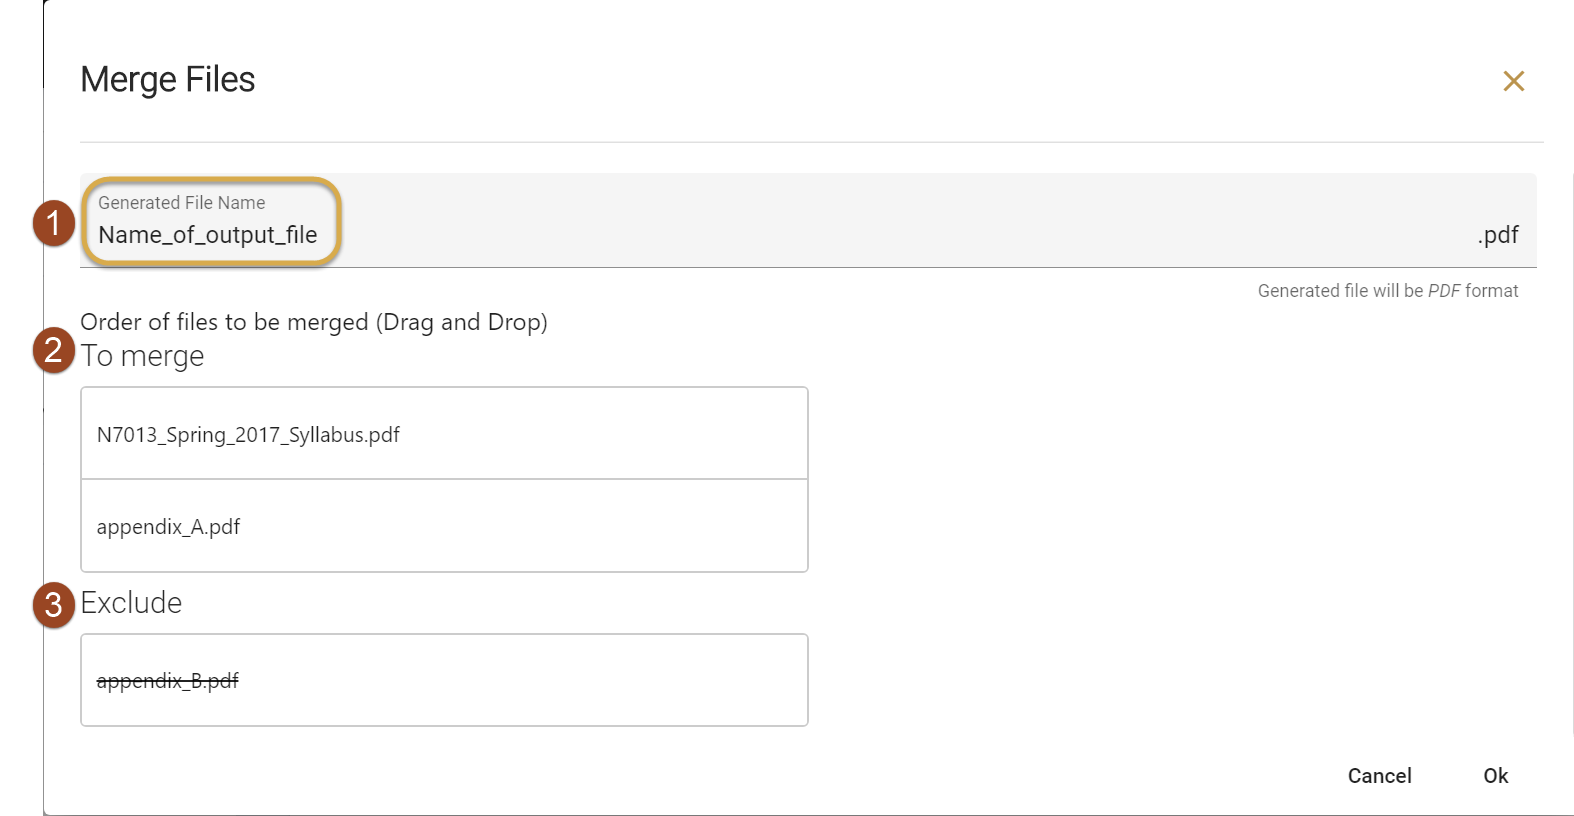
STEP 17
Name and order files
- Name the syllabus document
- Drag and drop (in order) the files you want to combine
- Drag any files you do not want to include in the syllabus to “Exclude”
Go to Step 15 to save and download syllabus file.