
The purpose of this article is to explain how to map a network drive in Windows 10.
If you are working off campus and need to connect to the I: or J: drive you will need to install the Pulse VPN client prior to connecting to network resources.
Learn how to install and use the VPN.
Step 1
Locate the Type here to search box
![]()
Step 2
Type File Explorer then click the result labeled File Explorer

Step 3
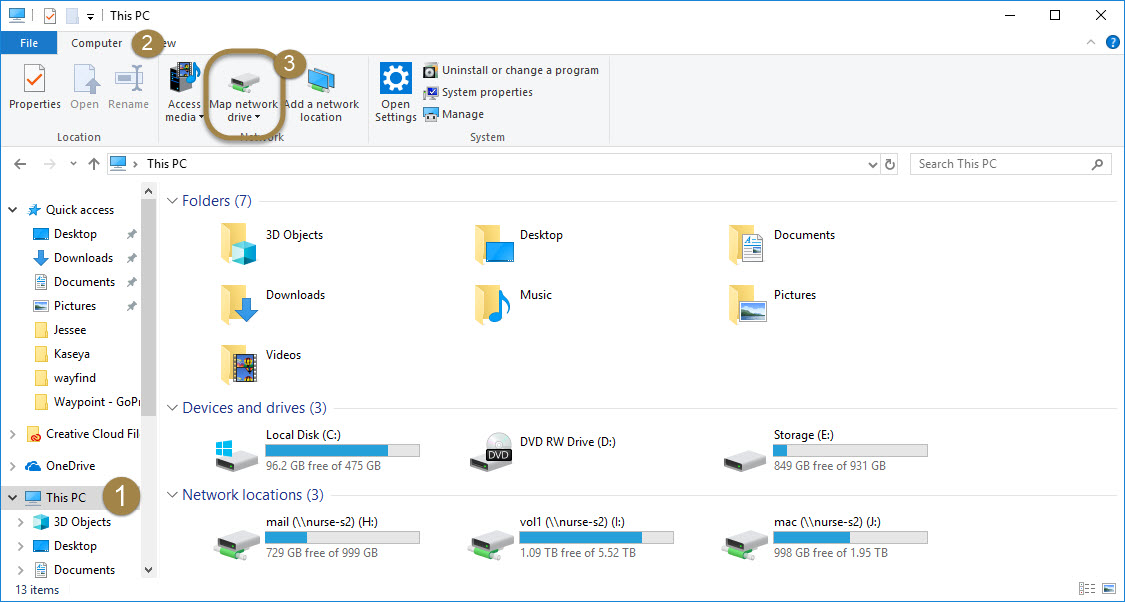
Select This PC on the left view pane. Then select the Computer Tab at the top. From there you will click Map Network Drive as illustrated below.
Step 4
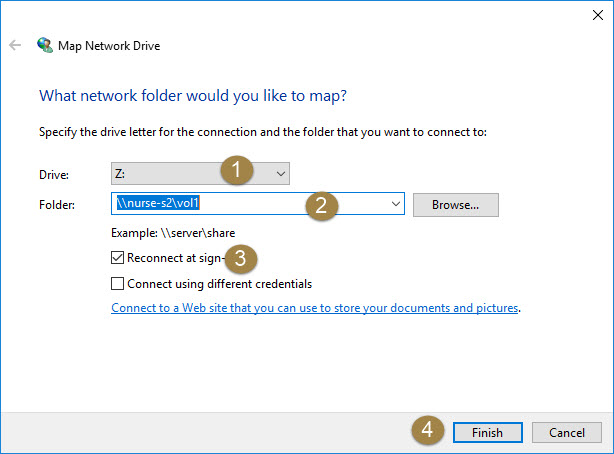
Select your drive letter from the dropdown. You can use any drive letter available, but for consistency you should use the following:
If you are mapping the I: drive type the following path into the Folder field: \\nurse‐s2\vol1
If you are mapping the J: drive type the following path into the Folder field: \\nurse‐s2\mac
Be sure to uncheck Reconnect at sign-in. Then click Finish
That should bring up the contents of that drive. You can now work on files in that drive or add and remove files from that drive.
NOTE: If you are prompted for a username or password. You will enter the username as: vanderbilt\vunetid and then your password.