This article will explain how to convert a Microsoft Word document to high resolution print-quality .JPEG/.jpg images from a Mac computer. This is useful if you are required to submit your multi-page Word document to a vendor as .JPEG images.
Step 1
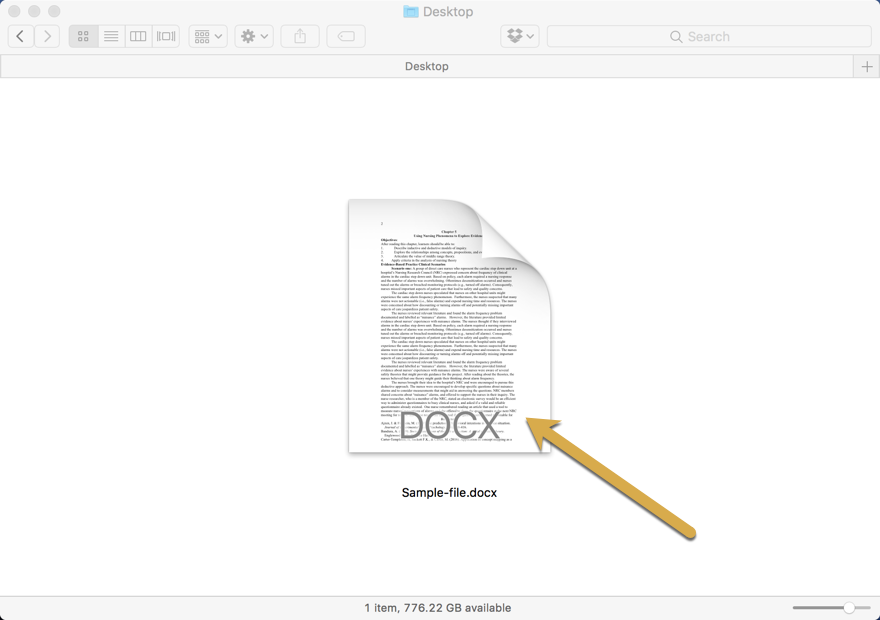
Open Your Word Document
Locate and open your Word document.
Step 2
Save File As
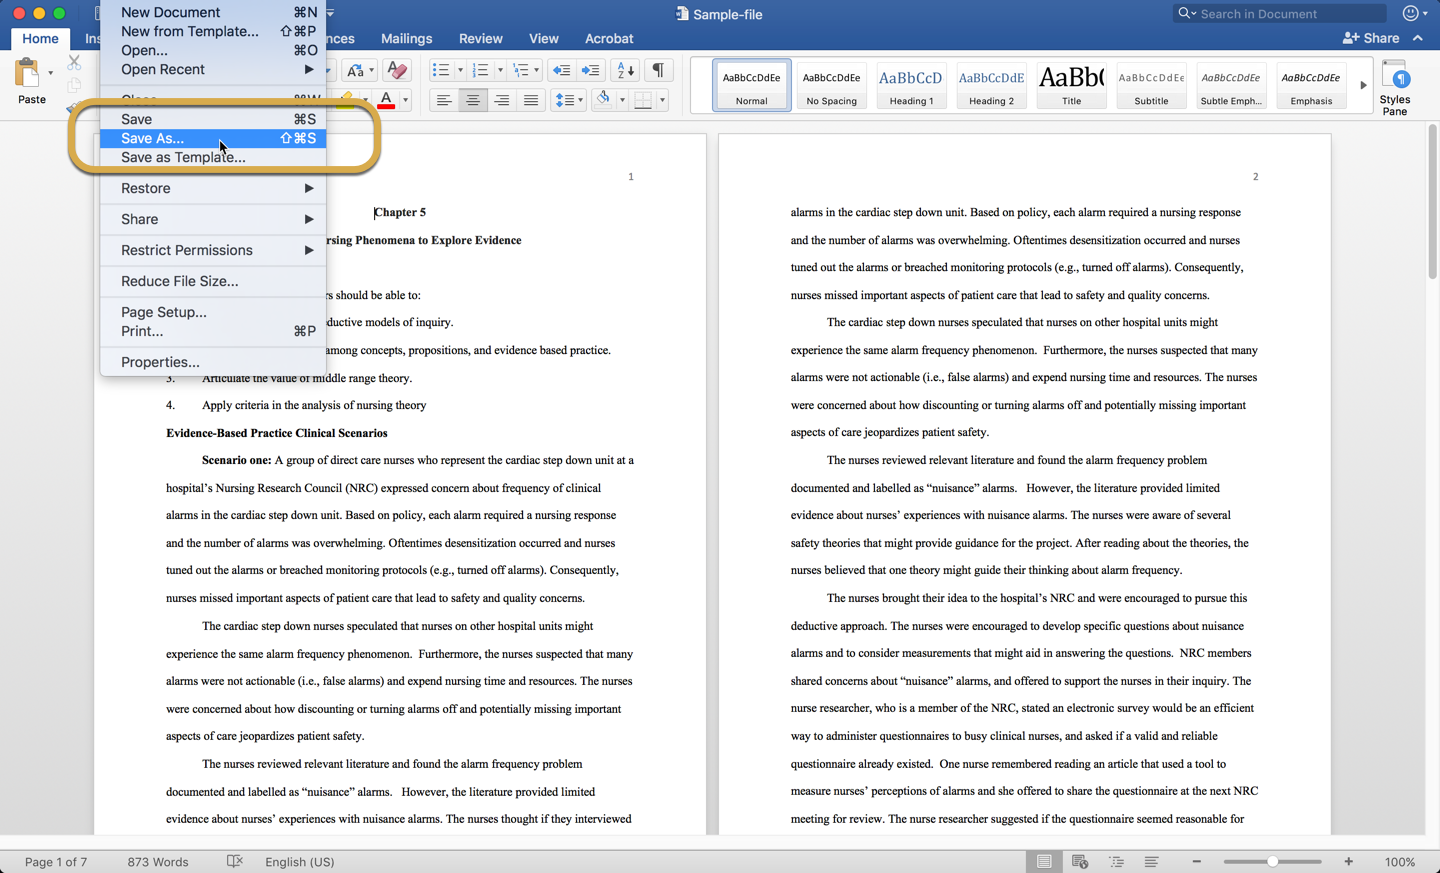
Once your Word document is open, Click the File menu and pull down to select the Save As menu item.
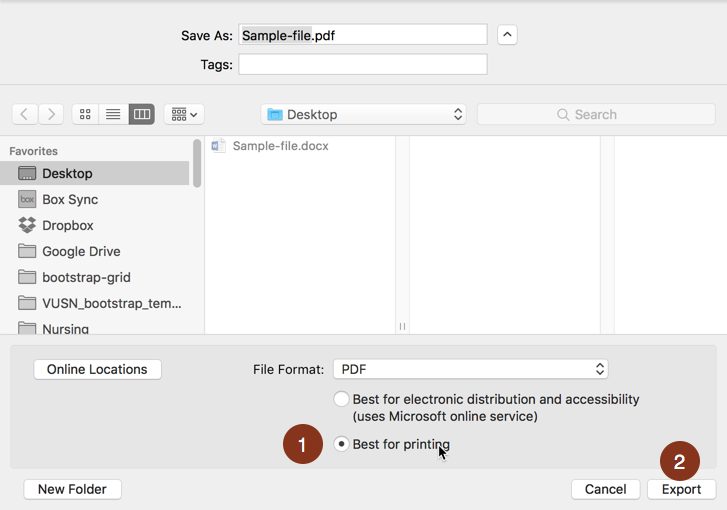
Step 3
Save as a PDF
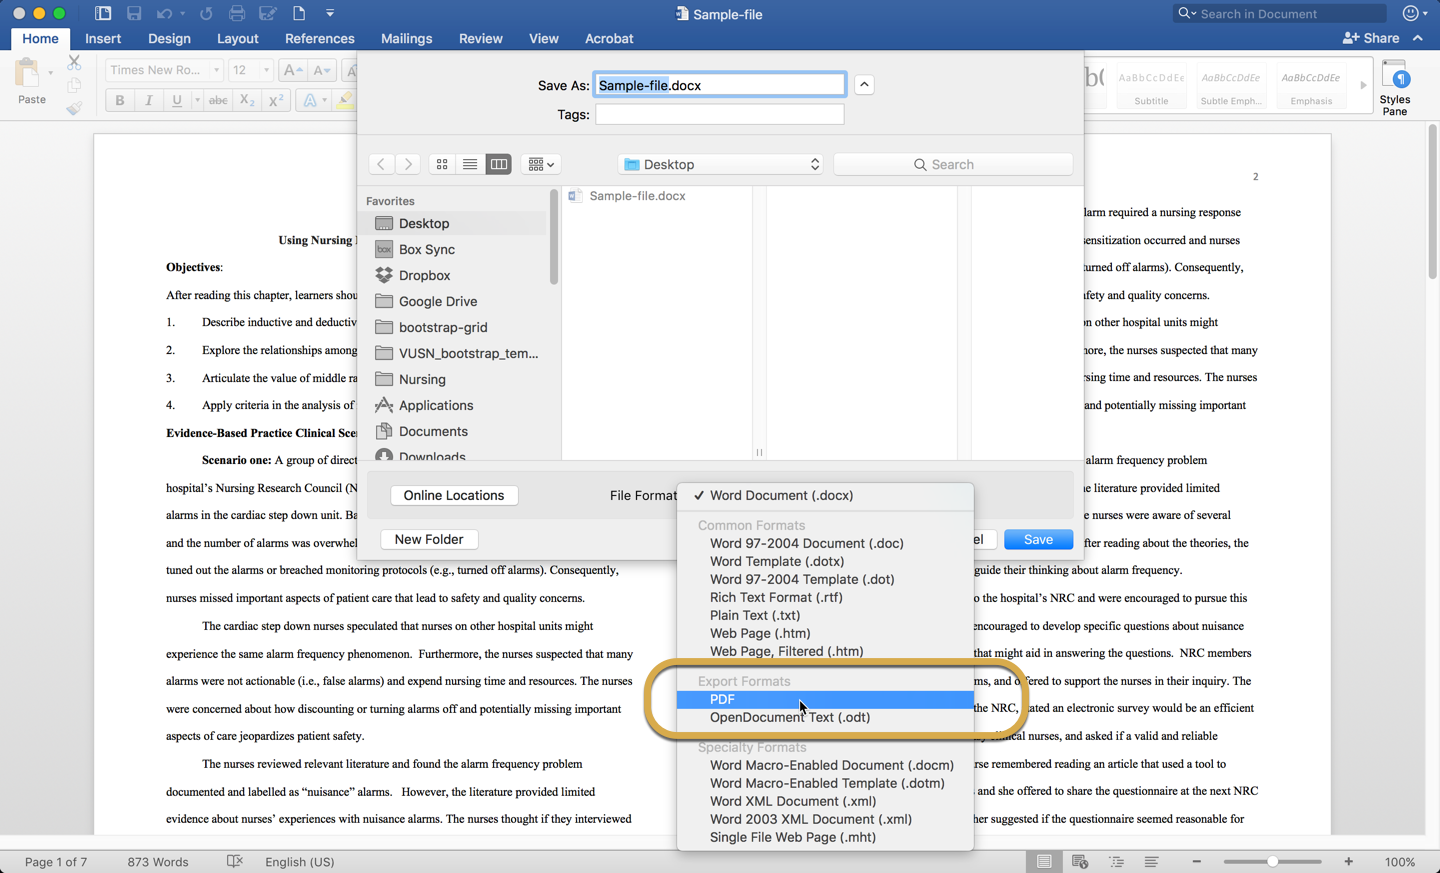
At the bottom of the Save As window click the pulldown button and select the PDF menu item under Export Formats.
Step 4
PDF Settings
Next, click the following items:
Best for Printingradio buttonExportbutton
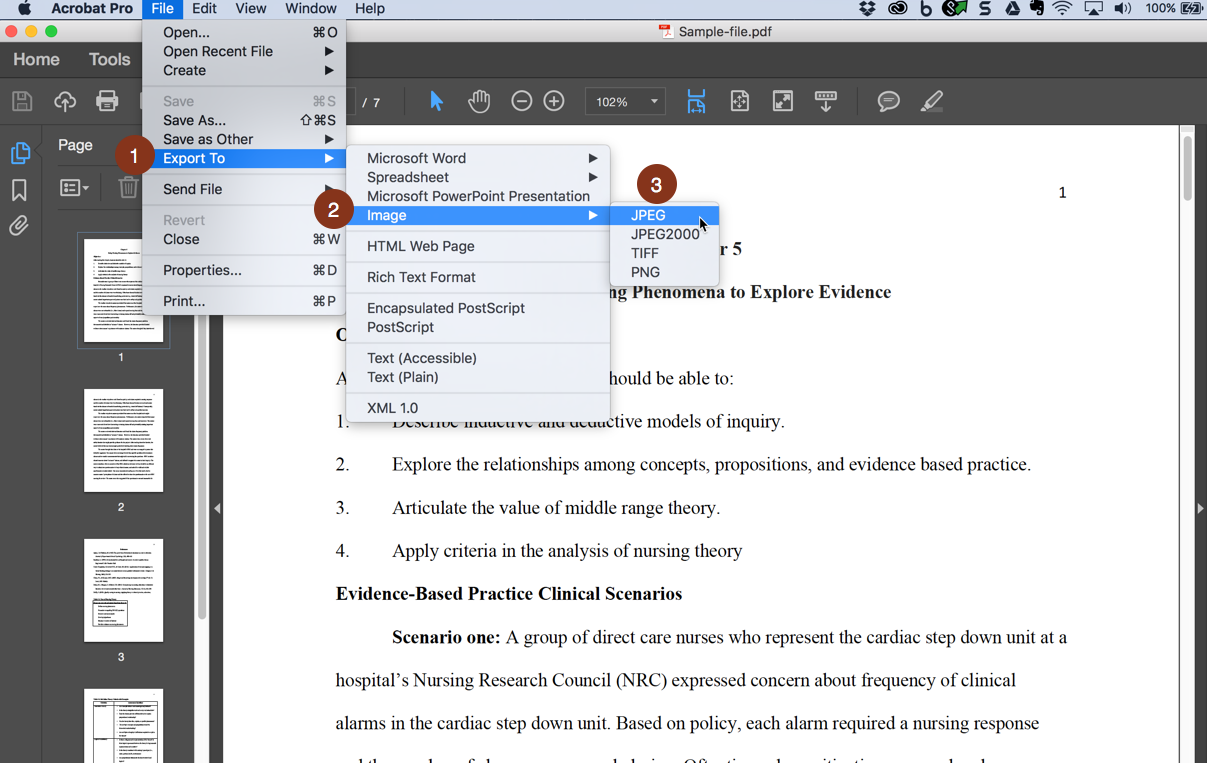
Step 5
Export from Acrobat
Once you have created the PDF, open it within Adobe Acrobat Pro DC (the free Reader version will not work). Next select the following items:
Filemenu Item >Export ToImageJPEG
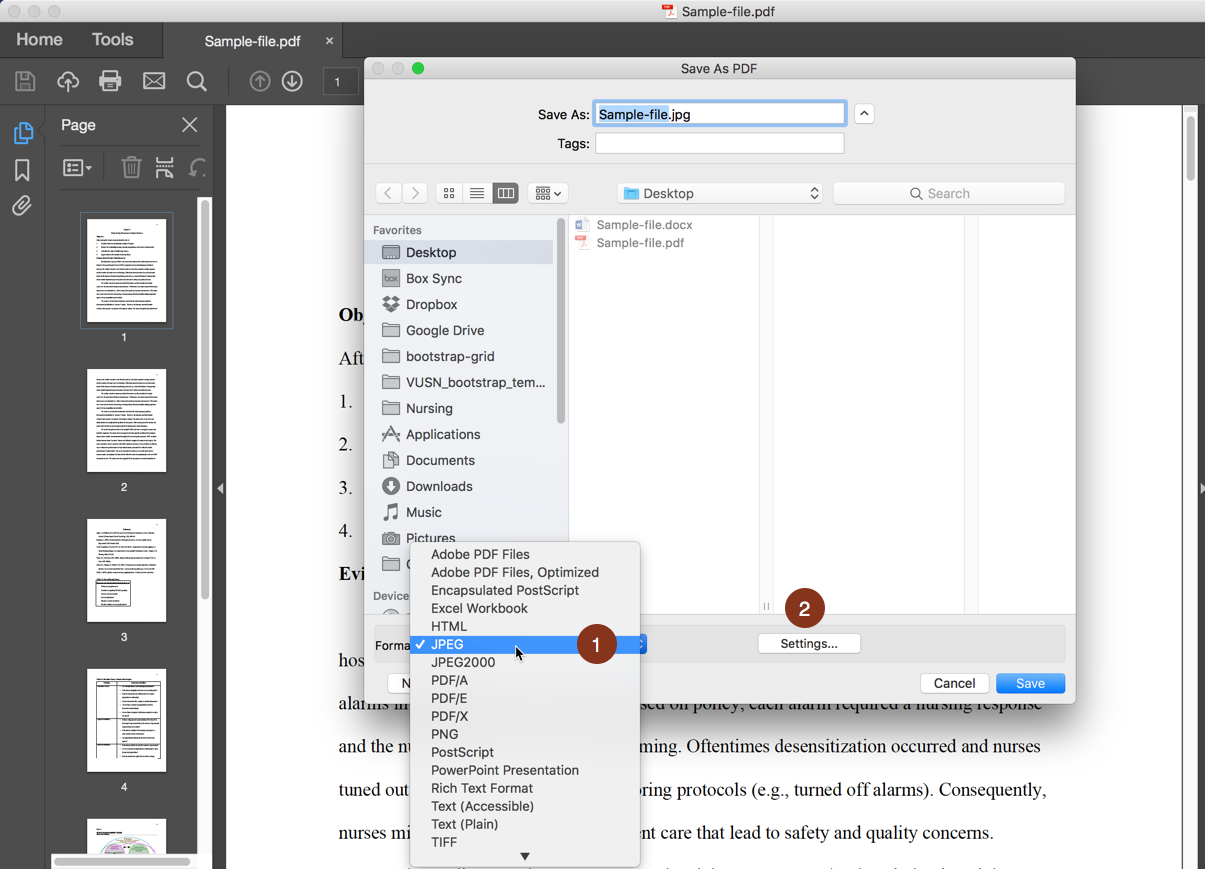
Step 6
Select JPEG settings
Make sure JPEG is selected and then click the Settings button.
Step 7
Specify JPEG Settings Properties
To produce high resolution print-quality JPEG images from each page of your document select the options shown below in the pulldown menus and then click the OK button:
- Grayscale & Color:
JPEG (Quality : Maximum) - Resolution:
300 pixels/inch

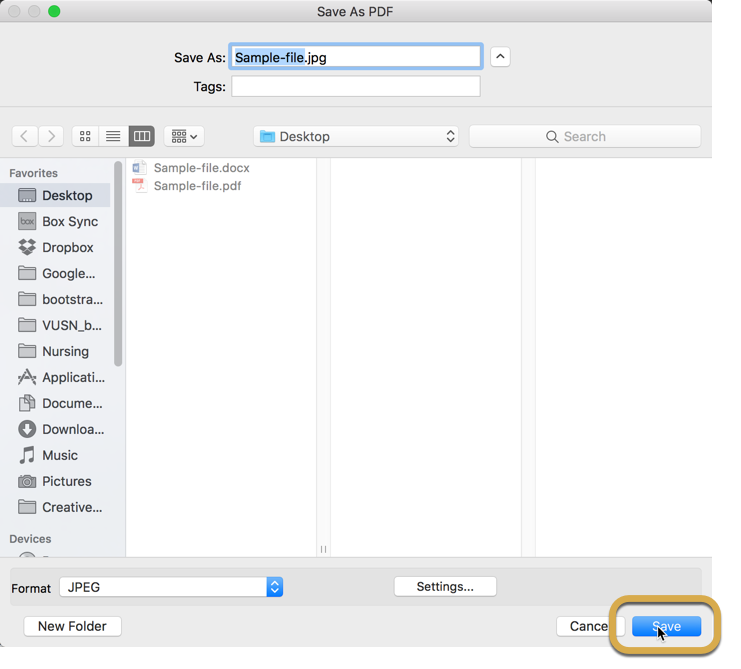
Step 8
Save the JPEG
The last step is to specify the location on your computer where you want to save the JPEG files and then click the Save button:
Step 9
View Results
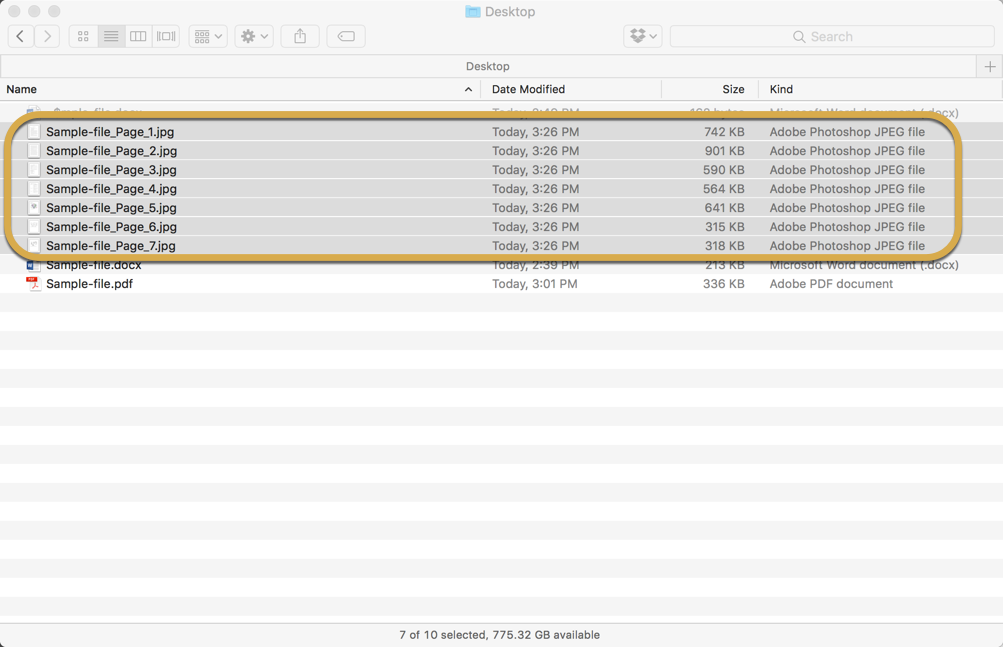
You will now have multiple JPEG images corresponding to the number of pages in your original Word document (In this example there were 7 pages in the Word file, thus there are 7 generated JPEG image files). You can then submit these JPEG files to your vendor/contact.